HomeWho Am IWhere I Hang My HatTrash & TreasuresWorkshops

Monday, November 28, 2016

New Workshop Schedules and Descriptions!


 Here is my new Workshop Schedules for December and January! I'd love for you to join us! Reservations must be made and paid in advance. Any cancellations must be made 48 hrs in advance in order for workshop fee to be transferred to a future workshop. Minimum of six participants necessary. 

Call 623-337-0793
Email Me to book!


Sunday, November 13, 2016

The Giant That Took Over My World

So when you last left the center of my world....me.....I had just made the decision (under duress) to purchase (well actually won at auction) a huge behemoth of a china cabinet made in the 1960's. Please read about it HERE if only to understand the thought process that goes into such a carefully constructed plan. 

So now I owned the danged thing and I needed to get it home. Dear GMan looked at me in "that" look with his head cocked to the side and said "Where are you going to put that thing"? Which isn't really a legitimate question in this phase of the acquisition process now is it? I had no idea and of course....no....it wouldn't even come close to fitting in his SUV. So we made the emergency call to our dear friends Theresa and Larry and sweet Larry came to our rescue. Without spending too much time on nonsense like how to get it home, the boys hefted and heaved and hoed the thing into the truck and I tagged along carrying my purse and the glass shelves....I HELPED!!! Really I did!!! Did I mention this was the middle of summer and about 115 degrees here in Phoenix? I was sweating in places I didn't know I had and I wasn't even the one doing the manual labor!


I bought this huge china cabinet to paint and here is what I learned!


I had them drop it right in my dining room because that seemed a reasonable place for it which is where it remained until October. Yes....October. This piece of furniture just NEVER ENDED! I kept painting and painting and painting and there was no end to it. 

So the first thing to do was choose the color and I was wrestling between Letterpress Grey and Bohemian Blue both of which I adore but I'm super glad I chose to do a combo of the grey and accents of Beadboard White

I love this paint and how it covers anything!

The first thing I learned is that this cabinet had NO solid wood anywhere on it. It was a very poor wood veneer done in the 60's when they basically laid contact paper over pressed board. It happened, however to be in excellent condition but I knew that my beloved paint which covers EVERYTHING with no prepping, priming, or sanding might need just a little bit of extra grabbing power so I prepped for a bit of light sanding with a sanding block. 

Look at that beautiful faux wood grain!

And then I took the back panels off so I could paint the inside unobstructed. 

I took the back panel off. There were a zillion staples

Taking staples out of the back panels one by one

I hate staples

Never again!

So after I painted the back panel in the lovely bright white Beadboard White I put the panels aside and started painting the cabinet in earnest. 

I put on the first coat of DIY Letterpress Grey

I'm not sure if it was the number of coats or the sheer size, but this guy wore me out and I thought I would never finish it. I honestly did tons of projects in between just because the immensity of it. It will probably be my last china cabinet. Here's how it turned out.

See how I "acquired" this behemoth and transformed him into a handsome devil

I love this cabinet staged with my Aunt's Green pitcher collection.

Check out the white wax accents with the DIY Beadboard White back boards

I think he turned out handsomely and I'm so glad he doesn't live in my dining room anymore. He went quickly to a new home and I know they are enjoying him where he BELONGS.....not as the white elephant in the middle of mine!


Sunday, November 6, 2016

A Tale of Two Auctions

We've already identified that I am not patient. I am also deeply affected by shiny things. Let me be the first to inform you, oh dear reader, that these are a deadly combination. At least when one is attending a furniture auction. Or better yet, TWO furniture auctions. 


Case in point. 

Over the summer my friend and partner-in-crime decided to attend a local furniture auction that I have bought from in the past. Their auctions were always on Saturdays which meant that I would do a write-in bid and that was that. Sometimes I won....but mostly I lost. It may or may not be because I'm so danged cheap. I'm not admitting any fault. 

But with my new business and life of leisure, I don't always work Saturdays so we decided to attend. I did my due diligence and the day before I previewed the furniture pieces (but not the box lots) and made notes as to the items I was interested in and how much I was willing to pay for them. 

I was prepared! 

So Sam, G-Man and I showed up bright and early to preview the box lots and make our notes. We decided to divide and conquer (mostly because all the ones I was interested in were later in the auction and I don't have the patience to stand and wait) Sam bidding on box lots and I would bid on furniture. It went wrong from the beginning. The very beginning. The bidding was fierce and items were going for retail pricing and above. It was borderline ridiculous. But something stopped me. 

After the 10th item I was interested in went for 3x what I would be willing to pay for it and I lost a few good deals because I wasn't first bidder, I decided to throw caution to the wind. I would be first bidder on everything that came up....that way if other bids followed I could bow out....if they didn't....I would have gotten a bargain, right? Seems reasonable? Yeah....to me too. 

Until the next item. 

Up went my bidder number! 

And then.....crickets.....just crickets....of course except for the annoying yip and cadence of the auctioneer pounding in my ear. 

And in the blink of an eye it was mine. All mine. 

Then I decided it might be a good idea to take a look at what I had just bought. Since it was a china cabinet. 

A humongous china cabinet. 

A gargantuan lump of a huge 1960's china cabinet. 

Heaven help me. 

Check back tomorrow for the end result!


Thursday, October 20, 2016

Despite Rumors to the Contrary.....

I am alive! Guilty as charged! I totally checked out this summer. I have no one but myself to blame. Trust me it wasn't because I was sitting on the sofa eating bon-bons. Although my hind end disagrees with that statement. I made the rookie mistake of scheduling a bit more activities than hours in the day. And boy did I pay for it. 

But I'm getting back in the groove and in my defense I did take a lot of photos that I will share with you in an attempt to get back into your good graces. I'll start now....

You may see that I've added a few more do-dads to the home page. 

1) DIY Paint: As most of you know I've been working with DIY Paint for a year now and LOVE LOVE LOVE it to pieces! If you go HERE you can read all about it AND you can purchase anything you can't live without. I will be adding a gallery of pieces and their colors to this page as time goes by.


2) Estate Sale Diva: Coming soon....I've had fun doing some estate sales this summer because it is essentially what I've done with my previous business for 8 years. I've had a blast and if I can help make that process easier for someone else then I'm all for it! Photos and details to be added.

And lastly.....a confession....in addition to three vintage markets in four months and an estate sale....I took an amazing girls trip for my 50th birthday to Turks and Caicos. I will tell you more about it very soon after I sort through the 6000 photos all 7 of us took! But here is a sneak peek


More to come!


Monday, July 11, 2016

My Weekend On The Town

So this weekend, like many weekends found me out on the town living it up! Dressed in heels with pearls in my ears being ushered into fabulous establishments with glasses clinking and sparkling conversation. 

As if....

Not even.....

Close....

Don't you just love old keys? This pile was a steal at a fun house this weekend! Pin for a great background image!


This weekend found me frantically driving from garage sale to estate sale to backyard hoard. All in 110 degree weather. In the Camry....

Anyone else get all dolled up for junking? Me neither...this is as good as it gets in 110 degree weather!
Note my fancy getup. Sexy right?

I know...I know...it's what I do, right? But this time the stakes were a little higher. I have a booth to fill at Junk In The Trunk Vintage Market in San Diego this weekend and not much time to do it. 

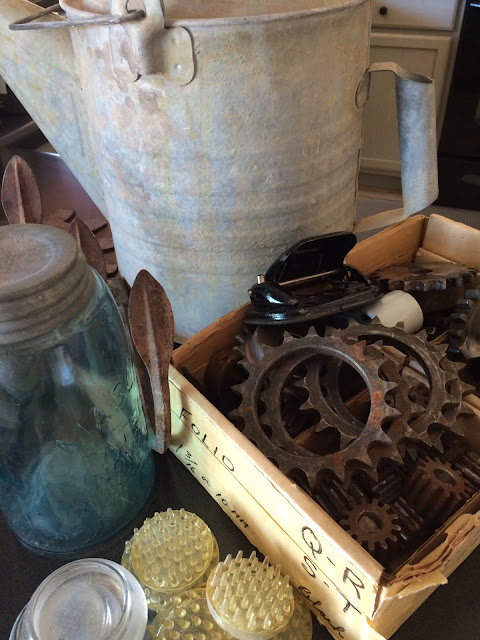
Now you know I nearly ran across the yard to dive for this ball jar! They aren't easy to find here, but what about the rusty metal gears and the watering can?
Anyone love gears? Wait til you see what I do with these!!
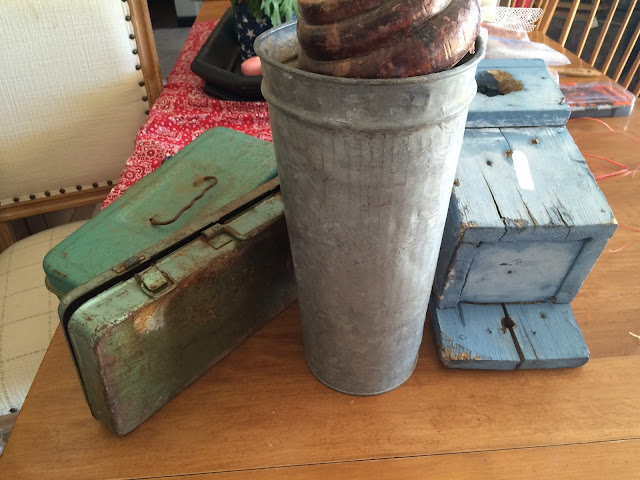
Who doesn't love rusty toolboxes and sap cans?
Toolboxes! Don't mind if I do!
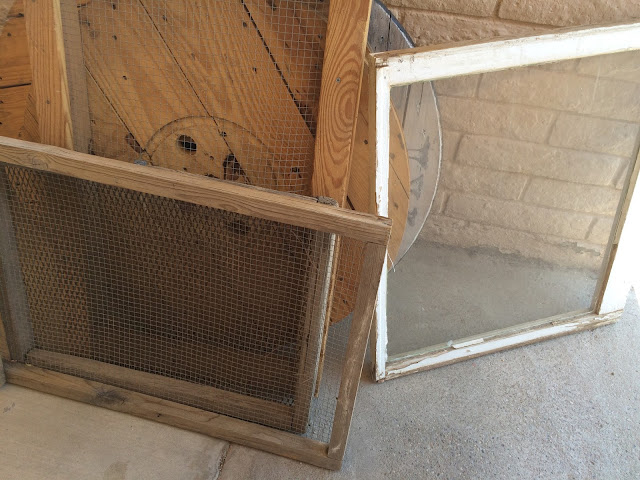
I just love these screens with old barn wood for hanging jewelry or keys or to use for a wedding or party place cards
Can you guess what I'll do with that window? See HERE for a clue!
Now I ask myself...Self? Don't you have a garage full and a side yard full and an office full of wonderful projects in the making? So I answered myself...Self...Yes I do, but you don't get it! Those things either:

1) require too much work
2) don't "go" with my look
3) won't fit into the tetris I have planned for packing

So I find myself out on the town. 

Wearing my grubbies and packing gloves. 

Sweating.....


Swearing....

And packing it all into a Camry

Thanks to all of those whose path I crossed this weekend. Had a blast!

Friday, July 8, 2016

Packing My Bags For The Beach

Check out this beautiful petal pusher blue cabinet heading to San Diego Junk In The Trunk Market

 I'm packing my bags to get out of Phoenix!! Here is a basic truth about living in the desert...it's hot in the summer. I mean UNBEARABLY hot....and no one has any patience with everyone being hot. So the only reasonable thing to do is get out. And any smart person knows that they should head to the beach. Right?

So when the sweet gals at Junk In The Trunk announced that they were doing their fabulous vintage market in San Diego....in July....right near the water.....I waffled.

I hemmed and I hawed....I sat a spell and thunk on it. I deliberated. I carefully weighed the pros and the cons. I calculated profitability vs effort. 

And 30 seconds later I pressed SEND! 

No brainer.... 

Duh... 


Here's where we all need to be if we love good junkin!! San Diego Liberty Station July 16th & July 17th, 2016

So here I find myself packing up to head out to San Diego. And it couldn't come a moment too soon! May and June nearly killed me! But I wanted to do something a little different this summer. I've been super inspired by maps and globes and the saturated color that I associate with summer. So I've been on a quest and here are some of my treasures that will be coming with me to the beach!


I love this primitive secretary and cabinet painted in DIY Paint's Petal Pusher and Beadboard White

See a color trend? I just can't get over the gorgeous blues in the DIY Paint line! 


I love globes! Do you?

It is so easy to paint with this paint. This color (Pedal Pusher) is so yummy! If you want to learn how to paint with chalk and clay paints and you are in the Phoenix area, check out my workshops HERE!


I adore this map in a vintage window frame! Love this idea!


Love these colors! They remind me of summer!

Check out my market schedule so you can come find me HERE!

Beautiful Petal Pusher Blue cabinet is going for a ride to the beach!
Pin me please

Monday, July 4, 2016

Fourth Of July Fail

Fourth Of July Fail

In the past 50 years I've learned some things about myself. 

#1  I really love crafts

#2  I'm really bad at crafts

#3  I love buying supplies for craft projects

#4  I'm really bad at following through on craft projects. 

So you will understand that when I saw the lovely Jennifer Allwood with her mane of blond hair and her adorable accent doing a super-easy, super-inexpensive craft for Fourth Of July I had to bite. 

Here are her super adorable balls:

How cute are these mod podged balls for the Fourth Of July?!?
Photo Via The Magic Brush-Jennifer Allwood


Please see her fantastic live FB feed on how to do these darling stars and stripes balls here!

Now that you've seen her project and how easy she makes it look you can agree that this seems like something that I, as a homo-sapien that manages to walk upright and form complete sentences should be able to accomplish. Right? Are you with me?

So of course I took myself immediately to the craft store to buy me up some supplies (because I've never met a supply I didn't like). I had these cute little metal buckets that I thought would be adorable with the napkins decoupaged on them. I'd use as a flower container or to hold silverware etc. Sounds reasonable right? Anyone want to take bets on how much I bought while I was there? Here was my list. 

1) Mod Podge (I already had a supply at home)
2) Sponge brush (I already had a supply at home)
3) Festive napkins


ONE ITEM! I only had to buy ONE ITEM!!!

Does anyone really need all this stuff for one Fourth Of July Craft? What do you think she does with it?
Does this look like one item to you?

No...No...this does not look like one item. This looks like someone with a shopping/hoarding problem. Is there a meeting for that? But I digress....so I brought my haul home and set out a space on the dining room table (because isn't that where everyone does their crafting?) and got started. 

On this day I had my lovely assistant with me. She is 16 and very willing to try whatever task I set before her. We discovered however that mod podge and Maia don't mix. 

Here is Maia...isn't she cute? 

Here is Maia. Isn't she cute?
Maia


How hard can this be to cut the napkins?
We've got this!


This seems easy, right? Just cut the edges off the napkins!
Easy, right?


Simply apply the mod podge in smooth strokes then lay the napkin down. Smooth and then apply mod podge over.
Just apply mod podge then napkin

 Now you can see from this photo that Maia has clearly confused our Fourth of July project for a candy cane. Her first attempt was to apply the napkins in a more organized fashion than the haphazard fashion in the video. Haphazard is the way to go here. 

So because I am the adult (clearly) and I have a fabulous grasp on crafting do's and don'ts (that's a damned lie) I picked up the stars portion of the napkin and another metal vessel and started to show her how's it's done (too ridiculous to mention). 


Your project will look way worse before it looks better. Be patient
No words


Here is what I learned:


1) Mod podge sticks to everything including fingers and fingernails. 
2) Brushes are borderline pointless
3) I'm not good at crafts
4) Tearing the napkins is way better than cutting. They lay down easier and blend together effortlessly
5) Take the white layer off the back of the napkin leaving the thinner overlay.
6) Smaller pieces = Better
7) Be ok with lumpy and bumpy
8) Don't plan a blog post about a craft before you've done it

Here is the final project as I set our Fourth Of July Table:


Check out this Fourth of July mod podged napkin vase. Easy project
The finished project


Don't you love the stars and stripes and watermelons?
Stars and Stripes and Watermelons

How cute is this Fourth of July table setting with the darling piggy salt and pepper shakers?
How could I not buy piggy salt and pepper shakers?

Extra napkins did NOT go to waste!!

Fourth of July!
Be Safe everyone!!